Free Stencil Maker: Photo to Stencil with Auto Bridges
How to turn a photo into a stencil that actually cuts as one piece, with real examples from our free tool and a look at the AI stencil generator for the jobs a photo conversion cannot do.
By Randall Morgan, founder of LaserBurn AI.
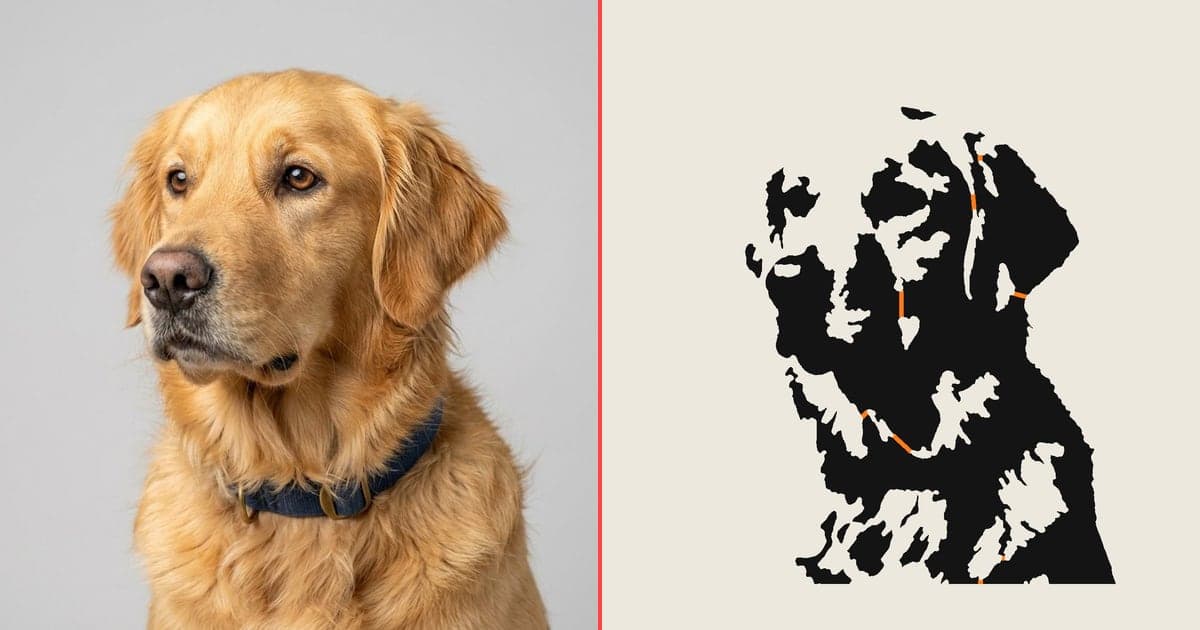
A photo to stencil converter has one job that most of them skip: making sure the result can be cut and used. A stencil is a sheet with holes in it, and any piece the holes completely surround falls out. Our free stencil maker finds those pieces and ties them back to the sheet with automatic bridges, so the SVG you download is a single piece.
Why stencils fall apart, and what bridges do
Think of the letter O. Cut the ring out of a sheet and the center disc has nothing holding it. Photos are full of these: a pupil inside an eye, a highlight inside a shadow, a whole face inside a dark background. Many free stencil makers threshold the photo and hand you the problem.
The image below shows the same skull stencil twice. On the left, the bridge strips are cut away, which is what you get from a plain threshold. Several pieces are now floating. On the right, the orange strips are the bridges the tool added.
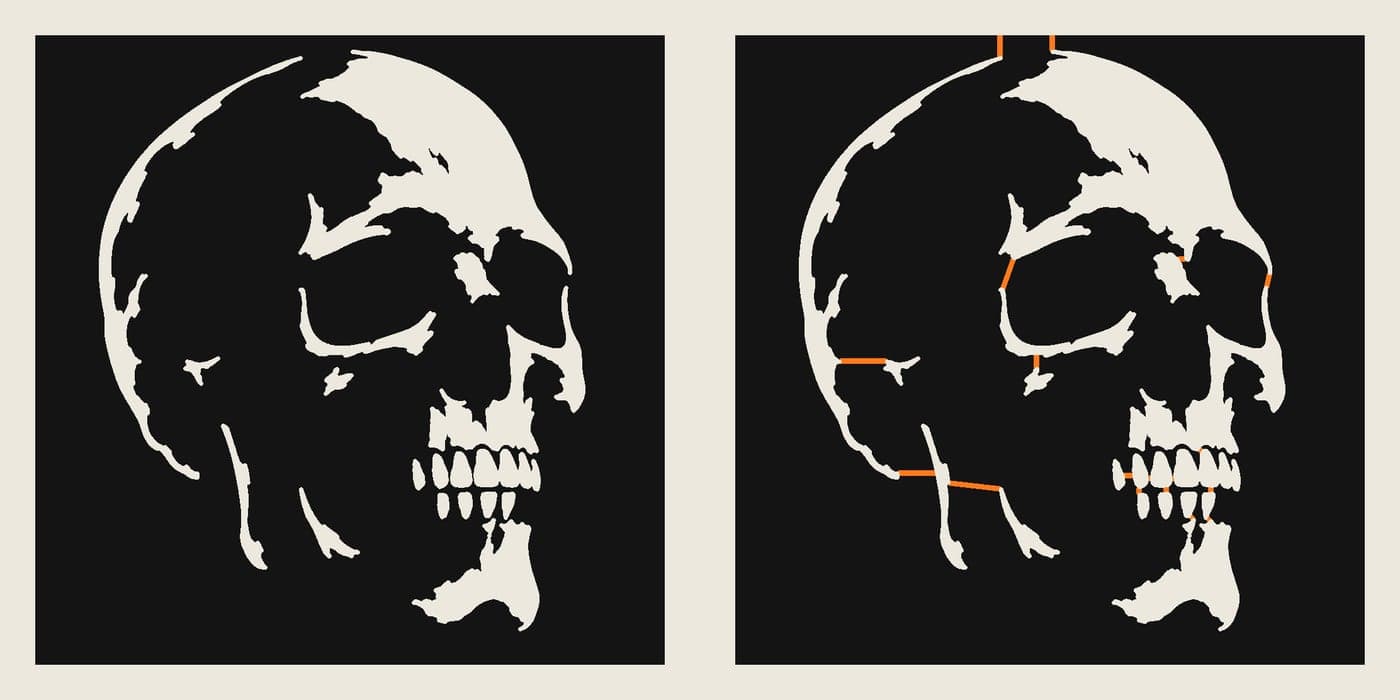
- It finds every floating piece. The check runs on the stencil itself, the way a cutter would see it.
- It adds the fewest, shortest bridges. Bridges are drawn straight where possible, and large pieces get a second one on the far side so they do not flex.
- It checks the exported cut paths. Not just the preview, so the file you download is one piece.
- Material presets set the sizes. Bridge width and the smallest feature are tuned to the material you pick, such as cardstock or Mylar.
One layer or three: spray-paint stencils
One layer gives the classic two-tone look. Two or three layers split the photo into tones so you can build midtones with spray paint. Each layer is its own one-piece stencil. Spray the lightest layer first, then each darker one on top.
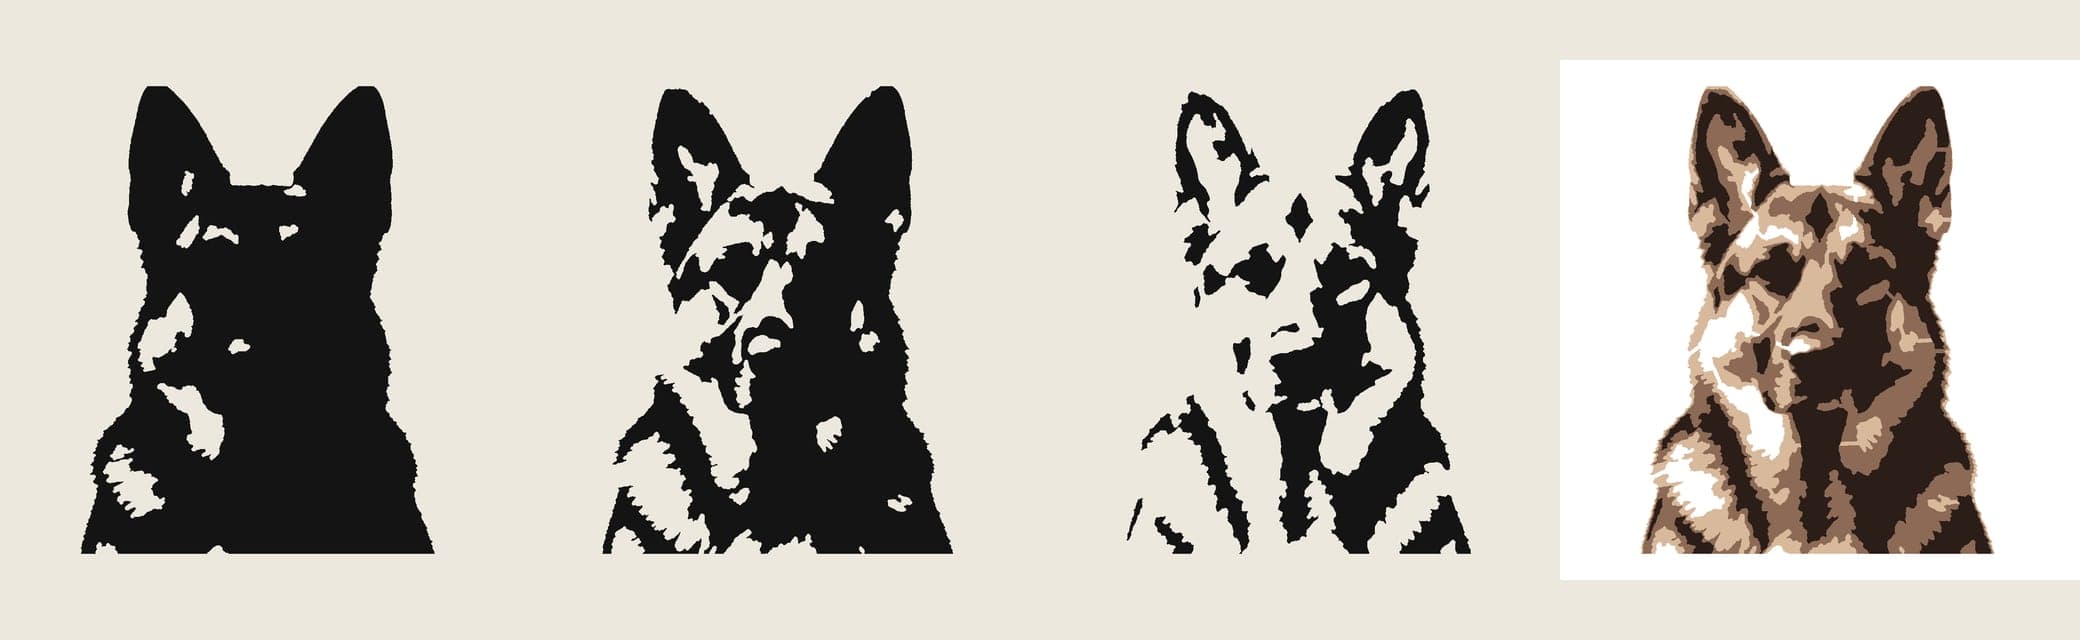
Every sheet gets three registration holes in its frame corners so the layers line up, and only one way round. The multi-layer download is a zip with cut-ready and printable SVGs for each layer, a preview PNG, and a README with the spray order.
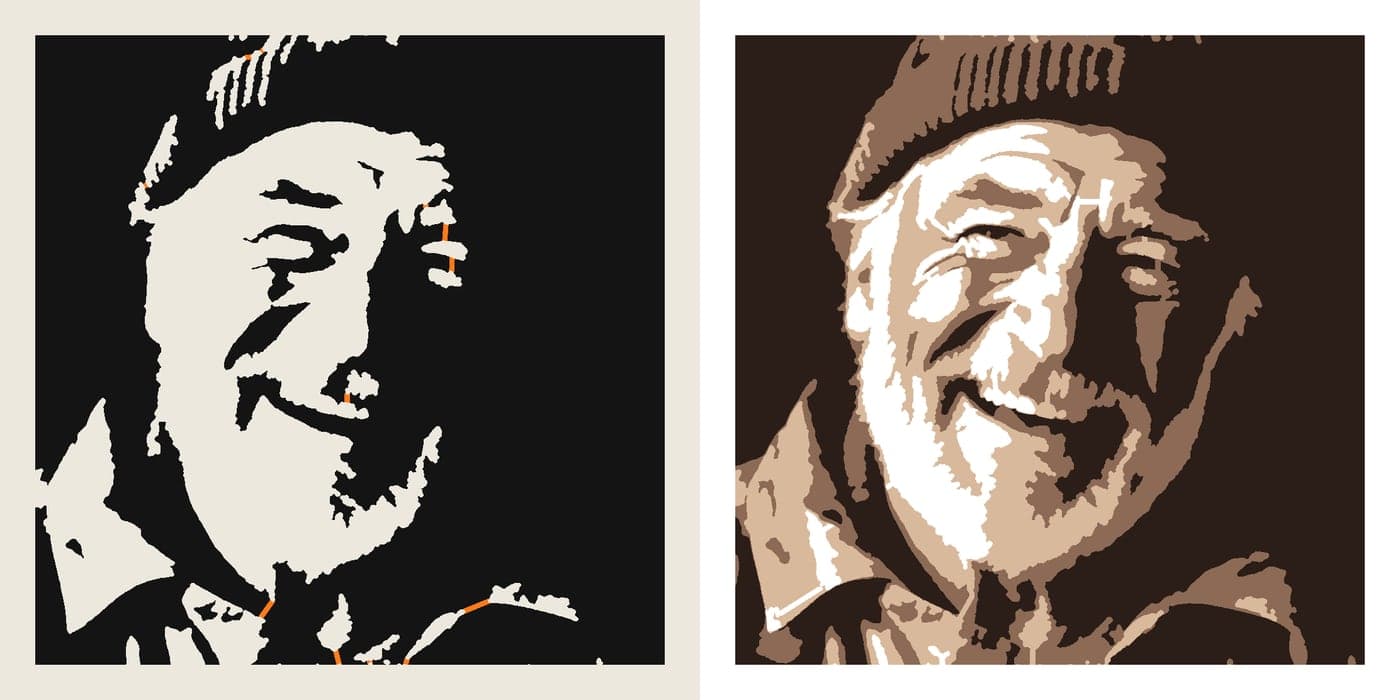
As a rule: use one layer for logos, text, and bold graphics, and three layers for portraits and pets.
How to make a stencil from a photo
- Pick a photo. Side lighting, a plain background, and a subject that fills the frame work best. Or try one of the samples in the tool.
- Choose layers, detail, and material. Lower detail gives bolder shapes that cut faster and survive more spray passes.
- Set the width and download. The SVG is sized in millimeters, so it opens at the size you chose in LightBurn, xTool Creative Space, Glowforge, or Cricut Design Space.
- Cut it. On a laser, set the red layer to cut. On a Cricut, upload it as a cut image. By hand, print the printable SVG, tape it to your material, and cut out the black areas with a craft knife.
Everything runs in your browser, so your photo is not uploaded. SVG and PNG downloads need no account. DXF export needs a free Google sign-in.
When a photo conversion is not enough: the AI stencil generator
Converting a photo only works with what the photo contains. A busy background turns into dozens of small shapes, and some designs do not exist as a photo at all. For those, we have a paid AI stencil generator. You describe a scene and pick a frame shape, such as round or hexagon, and it draws the design as a one-piece laser stencil panel. You can also give it a photo as a reference, and it redraws the subject as simplified shapes.
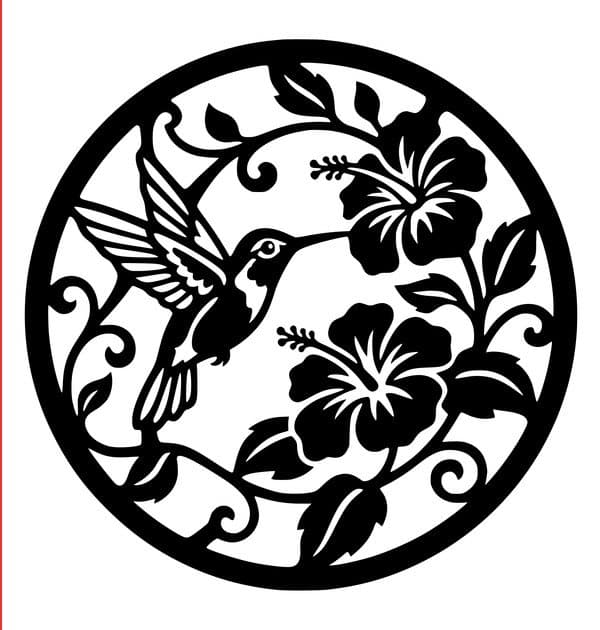
A generation uses 1 credit. Bridges are checked on the AI path too, so the stencil comes out connected rather than depending on the prompt. The two tools fit together: start with the free stencil maker for photos that already have good contrast, and move to the AI generator when you want something redrawn or invented.
Tips for photos that make good stencils
- Use side lighting. It gives faces real shadow shapes. Flat front lighting turns a face into a blank oval.
- Keep the background plain. Busy backgrounds become many small islands that each need a bridge.
- Crop tight. More of the stencil goes to the subject and less to empty space.
- Lower the detail if it looks fussy. Bolder shapes are easier to cut and paint.
- Test on scrap. Do a small test cut in your actual material before committing a full sheet.
Frequently asked questions
How do I turn a photo into a stencil?
Upload the photo to the free stencil maker, choose one to three layers, set the width, and download the SVG. The tool smooths the photo into clean shapes, removes specks too small to cut, and adds bridges so every piece stays attached.
What are stencil bridges?
A bridge is a thin strip of material that ties a floating piece back to the rest of the stencil. Without one, anything completely surrounded by a cut opening, like the center of an O or the pupil of an eye, falls out when you cut.
Is the stencil maker free?
Yes. Upload, preview, single and multi-layer SVG downloads, and the PNG are free with no account. DXF export needs a free Google sign-in. Your photo is processed in your browser and is not uploaded.
How many layers should a stencil have?
One layer gives the classic two-tone look and is the easiest to cut, which suits logos and bold graphics. Two or three layers add midtones for spray-paint stencils, which suits portraits and pets.
Will it work with Cricut, Glowforge, xTool, or LightBurn?
The SVG is sized in millimeters and imports at the width you set in LightBurn, xTool Creative Space, Glowforge, and Cricut Design Space. You can also print the printable SVG and cut it by hand with a craft knife.
When should I use the AI stencil generator instead?
Use it when you want a design redrawn rather than converted: a described scene, or a busy photo you want simplified into bold shapes. It generates a one-piece laser stencil and uses 1 credit per generation.
Ready to try it? Open the free stencil maker, or see our other laser cutting and engraving tools, including the single line art generator and the PNG to SVG converter.